

This simple and easy mod introduces a major fix to the A-B-X-Y-Start buttons on GameCube controllers. By lining the button slots with low-friction bearing material, we reduce or eliminate button wobble and achieve a much crisper and more responsive button press. Compatible with OEM and 3rd-party button sets. Uses the same PTFE tape from the FIRES Triggers Stage 1 mod, so if you already have that, this mod is free for you!
Time:
30-60 min
Difficulty:
No specialized skills or expertise required.
Type:
Performance / Functional Mod
Cost:
Under $1 per controller
Tools Required:
- Pointed Tweezers Example: Blue tweezers from this Bodyline set
- Sharp Scissors Recommended: Singer 4.5" Detail Scissors
- Screwdrivers Tripoint Y2.5 for stock screws
Torx T8 if you’ve done the torx screw upgrade
Parts List:
- ~3” length of low-friction PTFE Tape (0.012” Thick):
Saint-Gobain 2045-10 Skived PTFE tape, 15’x0.25”x0.012” (Also used in FIRES trigger mod)
St. Gobain 2045-10, Permacel P424, DeWal 204-10, Taconic 6115-10, CS Hyde 15-10HD-.25-5
For bulk orders, both US domestic and international, contact me via Twitter: @FiresCustom
Preparation:
Open controller shell:
Remove each of the six screws. We will be working exclusively on the top half of the controller, so you can set the bottom aside.
Remove PCB, button pads, & buttons:
Completely remove all parts from the top shell.
Prep Resin Buttons:
If using resin buttons, be sure to trim off any “flash” along the bottom edge of each button. “Flashing” is a small lip of material around the edge of a button, and is a normal byproduct of the resin casting process. However, any remaining lip/protrusion can catch on the bearing pads and prevent this mod from working properly. Small flush cutters such as this Hakko Micro Cutter work well for this.
Installation Process:
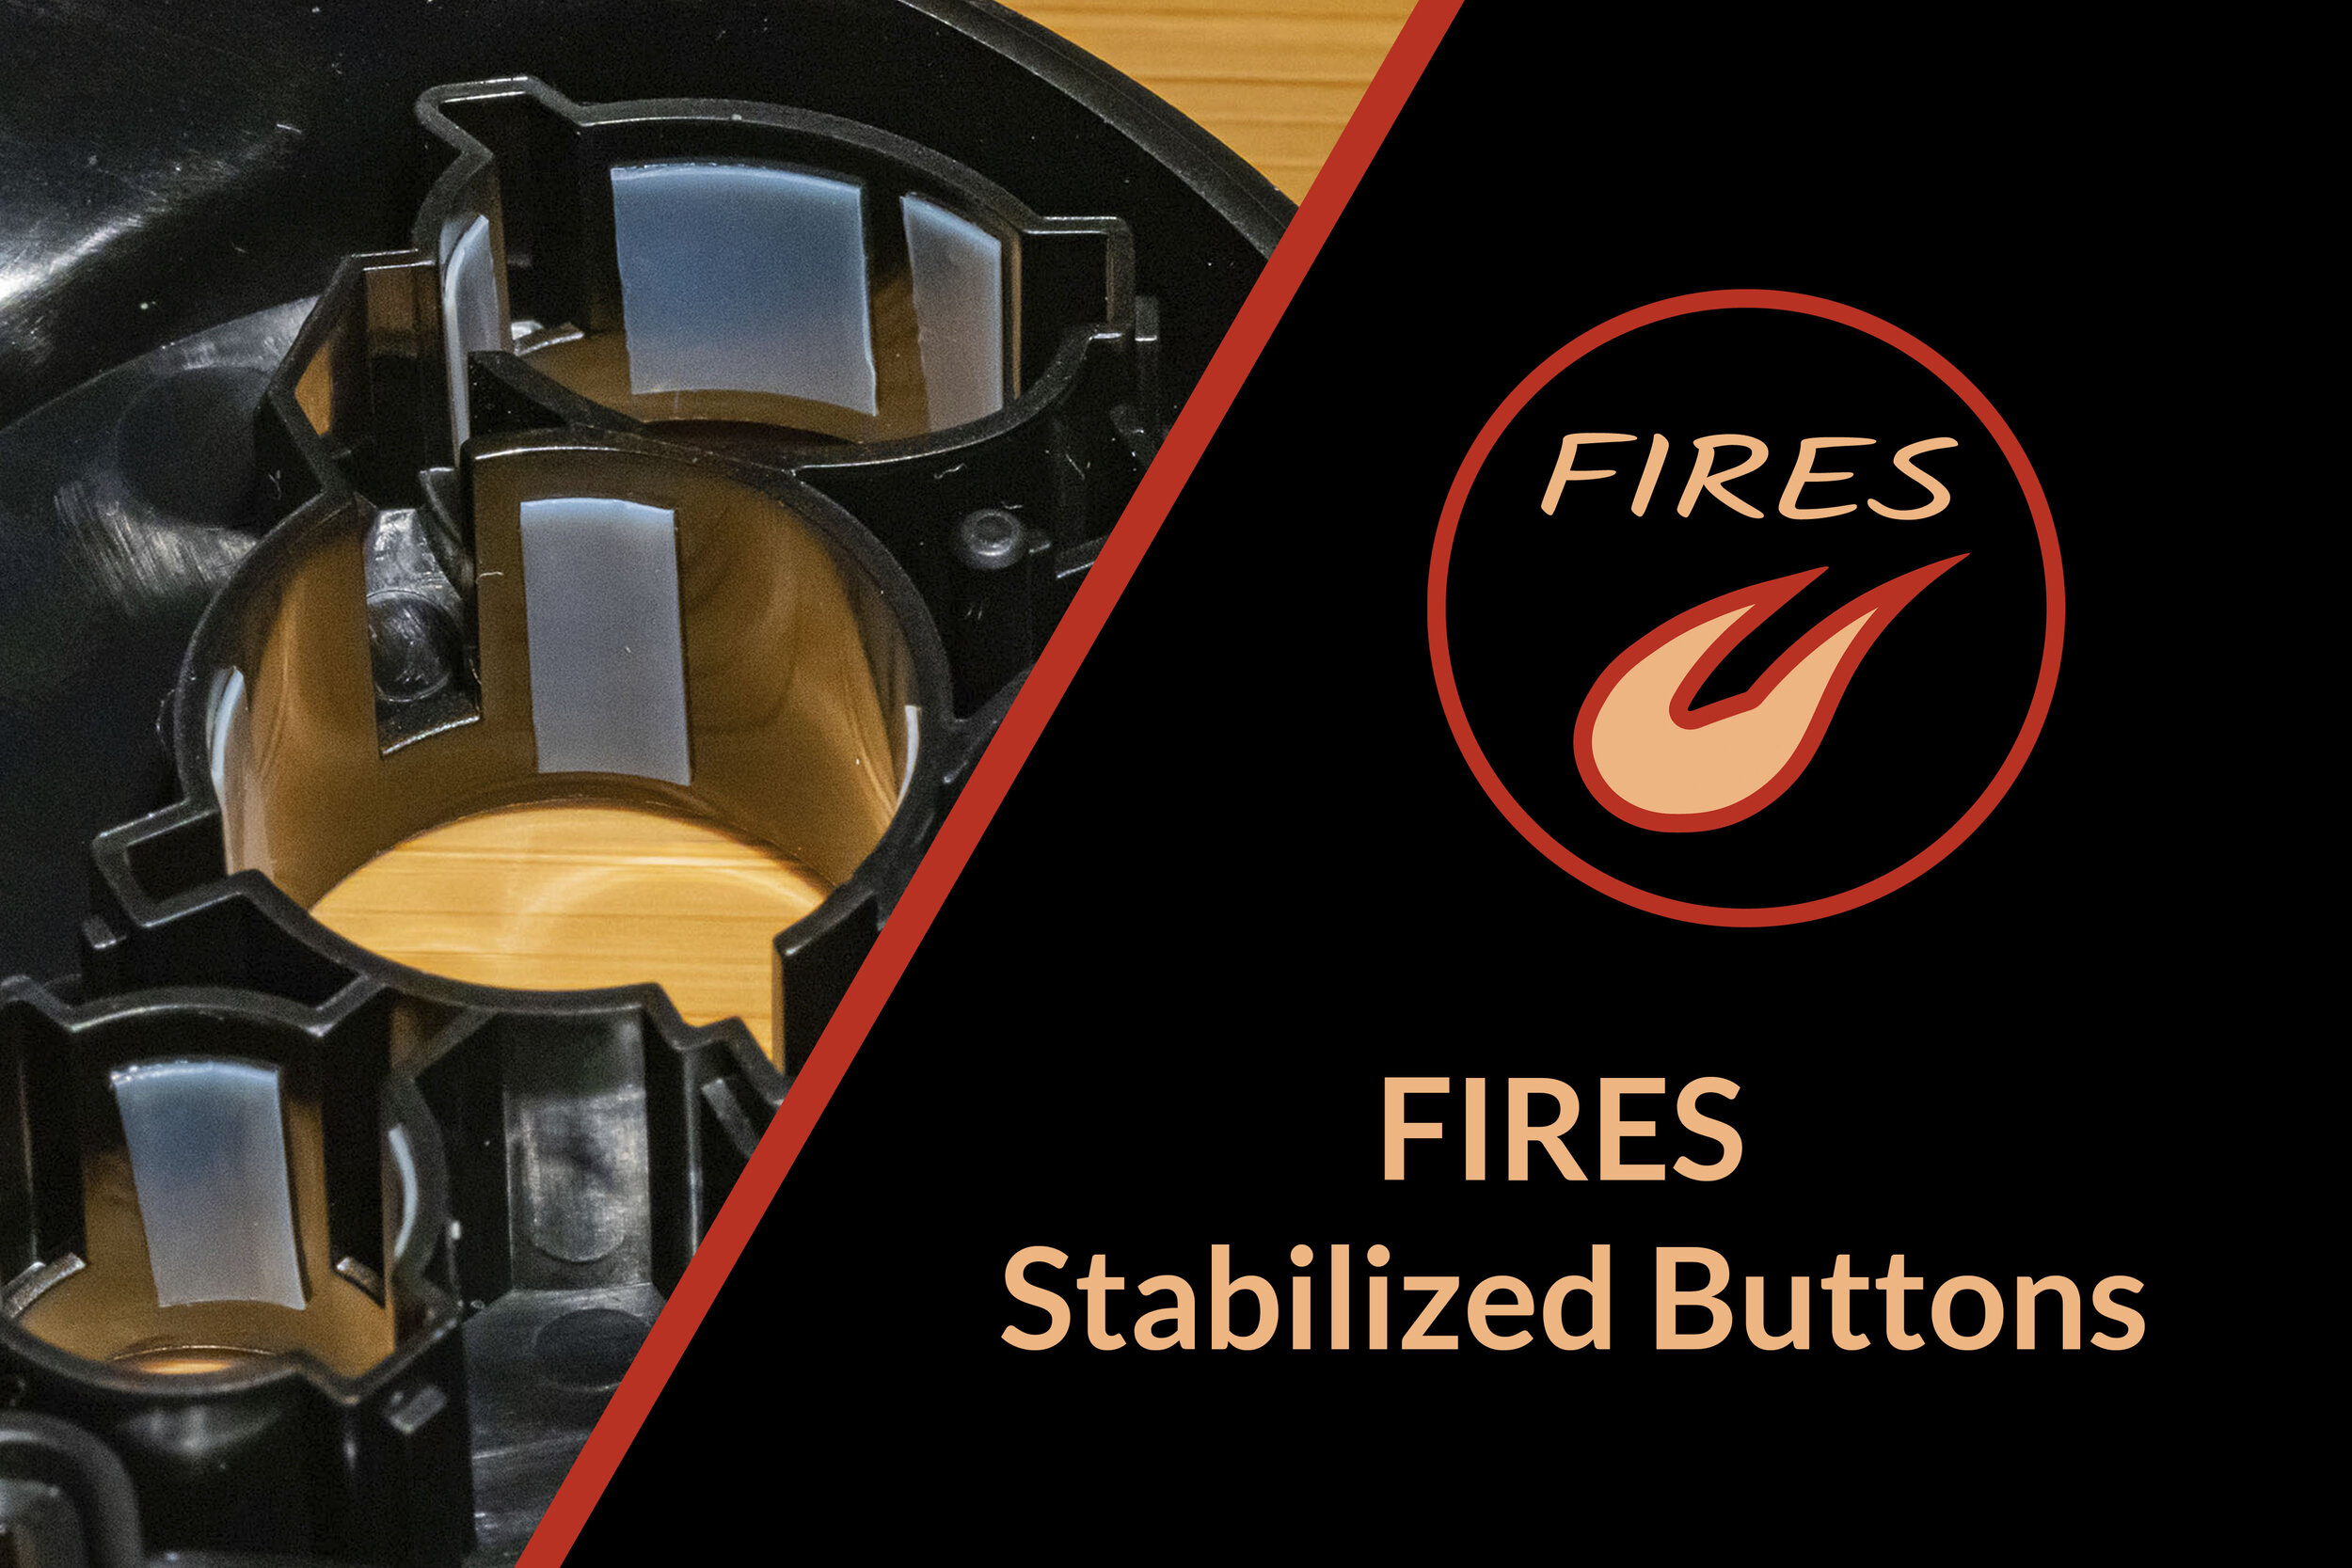
Bearing Material:
Although each button will be unique, all follow the same process. We will install bearing pads around each button to eliminate the extra clearance and provide a low-friction surface for the buttons to slide along. The bearing pads are cut from a 0.012” thick, hybrid PTFE/fiberglass tape (the same used for the FIRES Triggers Stage 1 mod!)
Examples of a full bearing pad set are farther below.
Bearing Installation:
Work on one button at a time. Cut a few thin bearing strips and place them around the button slot with roughly even spacing. This will give you a good starting point where the button well-centered during the fine-tuning process. A good rule-of-thumb for pad width is to make them roughly half the width of the bearing pad shown here (this one is very wide).
Once you place each pad, make sure to gently but thoroughly press it down and rub out any bubbles. Also, make sure none of your pads protrude past the lip of the shell in either direction, or they can fold over and catch the button. Don’t reuse bearing pads. If you mess one up, remove it and cut a new one.
Binding Check:
This checks how tight the button is and alerts you to remove/replace pads if your button is binding.
With the button in its slot, lightly lift it with your finger, and let it drop back down. It should audibly “tap” against the shell no matter where you lift it, or how lightly you drop it (even barely lifting it). If the button doesn’t “tap” down, this means the button is catching, which can happen if (a) you have too many bearing pads, (b) too wide of bearing pads, (c) bearing pads in the wrong places, or (d) you have resin buttons and haven’t trimmed off all of the flash.
Binding is a normal part of the process and tells you you’ve gone slightly too far. Experiment with bearing pad placement and size until you find a combination that prevents wobble but doesn’t bind up. If a button binds with pads on exact opposite sides (6 and 12 o’clock), try removing the 6 o’clock pad and installing a new one at 7 o’clock instead.
Wobble Check:
This checks how the loose button is, how much more bearing material you may need to install, and where.
After installing all the bearing pads for one button, put it into its slot, “pinch” it with your index finger and thumb, and try to wobble it in each direction. A tiny amount of remaining wobble is OK - a miniscule gap means your buttons don’t bind up. If excessive wobble still exists, add additional bearing pads, or replace slim pads with wider ones.
Light Test:
Holding up the shell/button to the light lets you check where a button may be catching or where you can afford to add some extra bearing material.
Repeat these steps until you’re satisfied that the button is smooth and wobble-free, but still moves freely. Then, move onto the next button and run through the same process.
NOTE: Resin buttons are typically slightly smaller than stock buttons and tend to need wider bearing pads. For especially undersized resin buttons, you may not be able to eliminate all of the wobble, but should still see substantial improvements.
Button-Specific Pad Placement:
Below are examples of one bearing pad arrangement to give you an idea of what each button may look like. There is no “one-size-fits-all” solution, especially if you use resin buttons. Note the slim pads at the top of the X and Y buttons - they are crucial for reducing wobble on those two. The Start button can also be somewhat stabilized using two tiny squares of bearing material.
Reassembly:
When you’re all finished up, reassemble the controller and double check that everything fits correctly. Your buttons should feel much more crisp and responsive, with almost zero wobble in their slots. Congratulations, you’re all done!